Vim_note
Vim 笔记
A nice cheat sheet of Vim shortcut/command on Git
install package manager
vim-plug
curl -fLo ~/.vim/autoload/plug.vim --create-dirs \
    https://raw.githubusercontent.com/junegunn/vim-plug/master/plug.vim
很多默认的功能
‘backspace’: Backspace through anything in insert mode. ‘incsearch’: Start searching before pressing enter. ‘listchars’: Makes :set list (visible whitespace) prettier. ‘scrolloff’: Always show at least one line above/below the cursor. ‘autoread’: Autoload file changes. You can undo by pressing u. runtime! macros/matchit.vim: Load the version of matchit.vim that ships with Vim.
Search and replace
NORM 模式里 按 / 从前往后搜索。 按? 从后往前搜索。
[
替换全局
:%s/old/new/gc
% 的含义是 全局的意思, 如果是 Visual selected 的模式下, 是不需要加 % 的
如果要搜索 i , (独立的i)
/\<i\>
\< 是 beginning of a word
\> 就是 end 啦
这里有个更棒的方案:
先抓取旧的词,
YIW
然后 search ` :
然后选一行写入要替换的词,再抓取一次, YIW
然后移到目标单词, 用 CIW<C-r>0 就是把这个词用 inner word 替换掉
然后我们就可以按 n/N 来移动 光标,然后用 . 来替换掉这个旧词
非常的酷
- Put the cursor on
foo. - Press
*to search for the next occurrence. - Type
ciw(change inner word) thenbarthen press Escape. - Press
n(move to next occurrence) then.(repeat change). - Repeat last step.
Vim 的神奇快捷键 1 -Searching
* 光标所在的单词 往下搜索
` # ` 光标所在的单词 往上搜索,并同时在 ` n ` 的功能上留下记录,也就是说,用了# 之后就能用n了,但是 * 之后不能
vimtex
\ll 开启/关闭自动编译
\le 查看错误日志
\lc 清楚auxiliary 文件
\lv 开查看器
长句子分段表示
:set wrap
直接在vim 的界面里打这个就可以啦
Vimdiff 在vim界面里怎么用 (macvim)
:e file1
:diffsplit file2
or
:vert diffsplit file2
Vim 如何安装plugin (with Vindle)
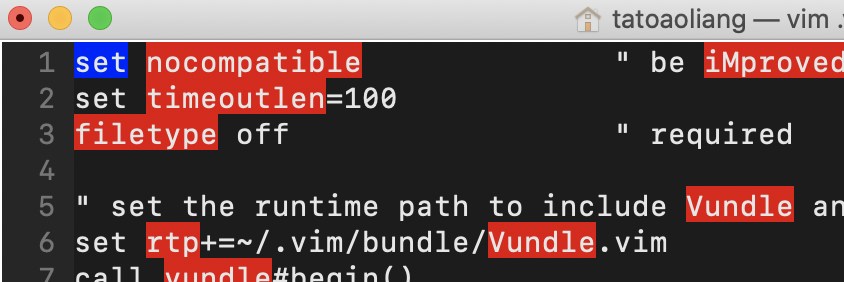
- 改 vimrc
- 然后打开vim,
:PluginInstall然后才会开始安装 vimrc里面的plugin - or
vim +PluginInstall +qall也可以在terminal 直接安装
`:Plugins 查看已有的plugins`
Vim 左右上下split 屏幕
https://www.linux.com/training-tutorials/vim-tips-using-viewports/
:sp
:vsp
Ctrl-w   +  (hjkl)  左下上右
Ctrl-w   +  (+-=)    空间扩大缩小相等
Vim 的神奇快捷键 2 - 加减文中数字
typing Ctrl-A will increment the next number, and typing Ctrl-X will decrement the next number.
Vim 分窗口显示
:vsplit 分成左右两个
: split 分成上下两个
想在窗口间切换的话,直接 control + w. 然后按 hjkl 方向键转移光标
Search by /
Find a whole world xxx. ` <xxx>`
自定义快捷Vim editor commaGnd
重新打开文件 (macvim)
Vim 多行操作
怎么在很多行的前面加一个字符
- Press Esc to enter ‘command mode’
- Use Ctrl+V to enter visual block mode
- Move Up/Downto select the columns of text in the lines you want to comment.
- Then hit Shift+i and type the text you want to insert.
- Then hit Esc, wait 1 second and the inserted text will appear on every line.
Vim 的神奇快捷键 3 - 选中段落
vip 是一个神奇的命令,会选中整个语意段
Vim 的神奇快捷键 4 - 跳号内的内容
% 是 括号之间的转换 比如 ( 就到 ) , ) 就到( ( )是直接找到下一个空白行
VIM 里面run python
这个就是run 该文件的commend
!python3 shellescape(@%, 1)<cr>
Vim 叼炸天功能1! qq record
[2020-03-29]
何为叼炸天呢,就是几乎只有vim能做到的功能。
qq 是 macros 宏 记录 开始 recood。左下角会显示 recording。
意思就是,此刻开始记录你的所有操作。然后在norm 模式按q 退出记录。
要复现可以点 . 或者 @q 但是因为.会被以后的操作覆盖,所以最后用@q
如果要对多次复现的话 可以用 100. 或 100@q
Vim 叼炸天功能2! register 粘贴板! [2020-03-29]
首先是我们如何把vim y复制的内容到clipboard里:
在norm模式下按 “+yy
粘贴的话也是按 “+p
“的含义就是 进入 register, + 代表的就是 mac OS的 clipboard。所以同理,我们可以自定义要register的符号 比如 “1yy “2 “3 “4 就可以把东西粘在不同的格子里,然后 “1p “2p 把他们取出来。
在INSERT 模式可以直接用 ` Control + R ` 启用register 模式, <Control + R> 0 就是粘贴 register 在0位置的字符串。
` :reg` 可以查看目前register的词
结合 Visual 模式
先 用 v 选中 你要的string 然后 按 “ x y 就可以把想要的string regitser 到 x 啦!
时刻监控 register!
Always show the register list in Vim
while :; do clear; cat .viminfo | grep -A1 '\"[a-z]\t'; sleep 2; done
这是我最后修改的内容
[2020-03-30] ! 这里还有更详细的register的文章!
原来,vim自动会把之前 d x y 的词register到1 2 3 4 5 里面!!这样就不怕我们y d的时候把之前的东西覆盖了!
“0 will always have the content of the latest yank, and the others will have last 9 deleted text, being “1 the newest, and “9 the oldest. So if you yanked some text, you can always refer to it using “0p.
".	上次insert的text。 The last inserted text
"%	当前file 名字
在 Insert 模式也可以用 <Control + R> 来代替 “ ! 所以可以在 搜索模式下使用!
为了更方便看register 了什么,Stack上还有这个答案
VIM Spell check [2020-03-29]
# .vimrc
# English & Chinese (cjk)
set spelllang=en,cjk
set spell
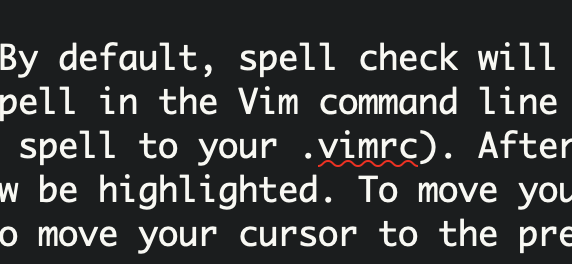
By default, spell check will be off. If you want to turn it on, run setlocal spell in the Vim command line (if you want spell check to always be on, add set spell to your .vimrc).
]s	 Next misspelled words
[s	 Previous mispelled word
z=       Give Suggestions (prepent 1, use first suggestions automatically)
zg       Add misspelled to spellfile
zug      Remove word from spellfile
Vim Config Highlight [2020-03-29]
因为Spell Check本质也是一个Highlight,所以我就想能不能自定义它的颜色。
Gui vim 
Vi (in terminal default) 
:hi SpellBad cterm=underline ctermbg=None ctermfg=146
:hi SpellCap cterm=none ctermbg=none ctermfg=none
# SpellCap 是句首字母大写,个人觉得没必要,可以用none去掉
# 在terminal的vim里颜色只有256种可以在下面这个链接选。

# 注意 在gui的 NONE要全大写,线的颜色用 guisp来配置
:hi SpellBad gui=undercurl guisp=#ff704d guibg=NONE guifg=NONE
Snip
Snip 有自动填充的功能的 Control + N 就会自动弹出来啦
跳动自动填充位置。Triggor
control + b 下一个 control + z 上一个 这些都是能在vimrc里设的
Snippet 信标机制
(这是我取得名字)
[2020-03-31]
${1:xxxx}	# 数字代表第几号信标 xxxx代表默认初始字符
$1		# 没有默认字符的话是这样的
$1 ...  $1	# 允许同一个信标出现多次,这样意味着编辑一处会影响几处
${1:VISUAL}	# 特殊的默认字符:用visual 状态中用 tab 扣取的字段代替
我还不确定为什么是tab键,我看了一下:reg 里面只是简单的放进了默认的”“里,可能是snip预设的吧。
snip script option
snippet 句末
` snippet keyward “xxxx” r/b/w/empty ` 最后的b是说,只有当这个t是行首的时候才显示
[b/w/empty]
- empty 什么都不输入默认是 一个独立的单词+tab 触发
- b 仅句首的单词触发
- w
- r 这是一个 regular express 的pattern (要配合python才能使用) 2020-04-04

<${1:div}>
默认是<div> 的意思,然后后面全部 $1 都会同时变化
要去掉变化,要用另外的代替符:
</${1/(\w+).*/$1/}>
Snip 调用其他的窗口内容 `
vim script: 调用当前时间
`v strftime("%c")` (`v)就是用vim窗口的内容, vimL, vim script (有待挖掘)
`echo $USER` (`)就是直接用shell的指令
`!p
#python code!
`
Snip + python
snip.c    # current value ?
snip.rv  #Represents the return Value,python code that was processed after the execution of the string assigned to RV
snip.fn # Represents the current file name
snip.basename # is also the current file name
snip.ft #Represents the current file type
snip.v #Represents a visual pattern variable that representssnip.v.modea pattern type that
snip.v.text #represents a selected character in visual mode
这篇文章有详解,还有关于 全局comment的snip function,待以后仔细研究
信标也可以用 t[1] 来表示
snippet req "require a module"
let ${1:${VISUAL: my_name}} = require ('`!p snip.rv = t[1]`');
endsnippet
Regular expression
2020-04-04
p = r'[\[\(](\d+)x(\d+)[\]\)]'
s = '[2x3]'
re.match(p,s)
match.group(0)		-> '[2x3]'
match.group(1)		-> '2'
match.group(2)		-> '3'
match.group(3)		-> No such group
原来group(0) 就是原string的意思。
Interactive Snip (Screenshot)!
[2020-03-30] 耶✌️ 我成功把 mac的截图功能整合到 vim snip + markdown 里了!
snippet ss "take a screen shot and save to the
directory(post_asset) with title of the same title of your file(snip.basename) + number(in order)"
`!p
import os
from subprocess import Popen
# get the number that
file_name_lists = [name.replace('.png','') for name in os.listdir('post_asset') if snip.basename in name]
file_numbs_exist = [int(i.split('_')[-1]) for i in file_name_lists]
file_index = str(max(file_numbs_exist+[0]) + 1)
file_name = snip.basename + '_' + file_index + '.png'
# should be modified if change the directory name
target_path = os.path.join("post_asset",file_name)
# exec the interactive screen capture
# not be able to use subprocess.call, it would cause screencapture process not stop,
# and keep taking multiple screencapture, and the filename index breaks, I think this is a snippet bug.
Popen(["screencapture", "-i", target_path])
# snip.rv = ''
snip.rv = '< img src="{0}" alt="{1}" width="400"/>'.format(target_path, file_name + ' failed')
`
endsnippet
这样我只要 按ss [tab] 就可以直接截图到对应的文件夹里,并且在markdown里显示成img了🐮
下一个项目: snip + markdown 自动录屏转 gif
要下个月才能开始做了!得先搞学校的东西了!
Easy Align
NERDTree
:NERDTree # 在vim里打开sidebar

control + w , 然后 p , 切换上一个窗口(文本编辑和nevigate sidebar)

control + w , 然后箭头, 按方向切换 或者是 hjkl
关闭窗口就还是 : q